This post may contain affiliate links. See my disclosure at the bottom of the page for more information.

Super Spice-y
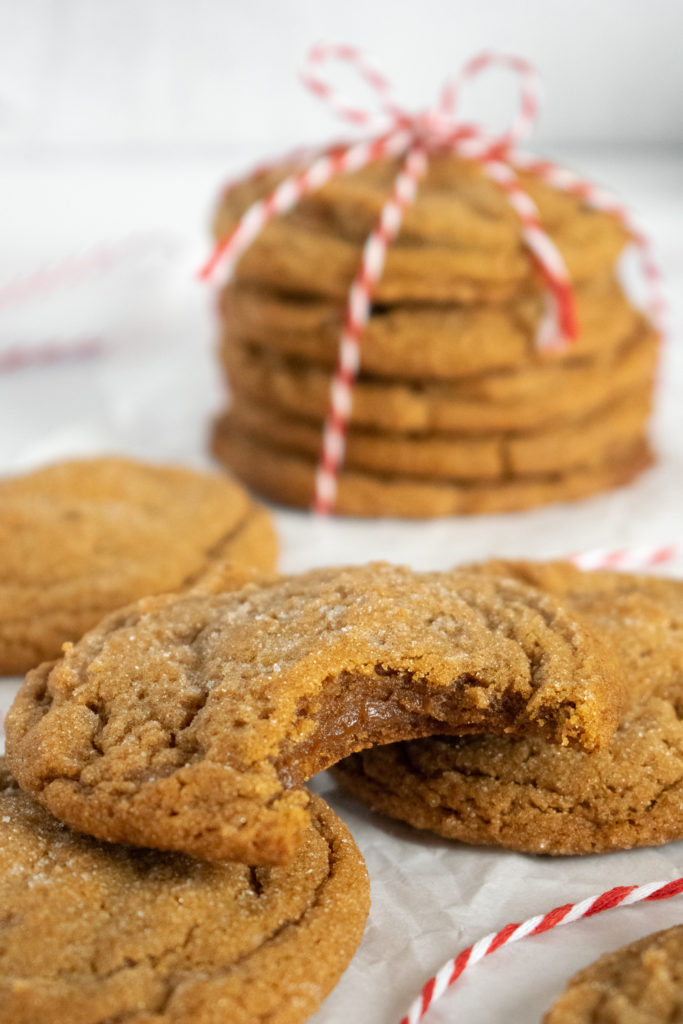
I’ll admit, it’s tough to account for everyone’s tastes when you’re making recipes. I am a salt fiend, I love things really salty but not too sweet. Brad on the other hand loves things very sweet, what I would often consider “too sweet.” Bottom line is: it’s not easy making everyone happy. We were both able to agree on the spice level in these cookies though. Small adjustments to the spices can change the flavor pretty significantly, even the brand you use, how long you’ve had it… these factors can all make a difference. (Side note: Bon Appetit magazine says ground spices are good for only three months?! Let’s be honest, there are some in my drawer that have been there for years. But if your spices date back to a time when MySpace was all the rage, it’s probably time to toss and re-purchase.) Anyway, my goal for these cookies was to create a make-everyone-happy spice level, but there are no guarantees in life. If you’re a total ginger nut you can use rounded teaspoons to bump up the ginger flavor even more, if you’re a cinnamon person you can do the same with the cinnamon. However, beware the clove as it is quite strong and can overpower the other spices if you’re not careful. Since there is no raw egg in the batter you can “safely” taste test this dough a little as you go and see how the spices taste to you before you bake.
I’ll Say it Again: Cookie Scoops
If you are one of the two people who read all my blog posts (I’m one of them by default, I’m actually not sure if there’s a second…), you’ll know that in all of my cookie recipes I recommend using cookie scoops. I have a set like this one and I cannot tell you what a time and mess saver these are, especially with a wet dough cookie like this one. Not only do they make things quick and clean, they also ensure all your cookies are the same size and are the same shape. This means your cookies look super pro, even if you’re a beginning baker. If you don’t bake a ton maybe you’re thinking “I don’t want to spend $20 on some scoop I’ll use once a year” BUT I beg to differ. I use the large one in the set for ice cream year-round, and both of the smaller ones for different cookie recipes of all sorts (the smaller one I use for the Vegan Chocolate Peppermint Cookies). Even if I did only bring them out at Christmastime I’d still think they were worth it… After all, the older I get the more swiftly Christmas comes around again each year! Oh and I also recommend using a cookie sheet without sides for this recipe if you have one, just so you can slide the parchment paper right off the side and onto the cooling rack. The cookies are very soft when hot so they fall apart easily if you try to move them with a spatula. For reference, I use these cookie sheets from Williams-Sonoma.


Vegan Ginger Molasses Cookies
Equipment
- Medium cookie scoop (apx. 3 tbsp)
Ingredients
- 3/4 cup vegan butter at room temperature (or regular butter, if you choose)
- 1/2 cup light brown sugar, packed
- 1/4 cup granulated (white) sugar, plus extra for rolling
- 1 tablespoon Bob's Red Mill egg replacer, plus 2 tablespoons filtered water to mix (equivalent to one egg)
- 1/3 cup molasses
- 2 cups all-purpose flour
- 1-1/2 teaspoons baking soda
- 2 teaspoons ground ginger
- 1 teaspoon ground cinnamon
- 1/2 teaspoon ground cloves
- 1/8 teaspoon salt (1/4 tsp if your vegan butter is unsalted)
Instructions
- Cream the vegan butter and sugars in the bowl of a standing mixer with the paddle attachment, or by hand with a whisk. Mix egg replacer with water according to the package instructions and let it rest a minute. Add the thickened egg replacer to the butter mixture along with the molasses, ensuring everything is well combined. If using a stand mixer be sure to scrape the bottom and sides of the bowl.
- In a separate medium-sized bowl, whisk together the flour, baking soda, ginger, cinnamon, cloves and salt.
- Add the flour mixture to the butter mixture and stir just until it's all well combined (you don't want to overmix, but you do want it to look uniform and smooth).
- Using a medium-sized cookie scoop (apx. 3 tablespoons per cookie), scoop balls of dough and place them in a single layer on parchment paper or wax paper. It's normal that the dough will be quite soft, though the scoops of dough should hold their shape. As this step is to chill (not to bake) you can put them close together on a cookie sheet, or in an airtight container, even on a plate. Whatever works best and fits in your fridge where the balls can sit, covered (plastic wrap is fine), for at least one hour. The chilling time is what gives the cookies their thickness, otherwise they may bake pancake flat (they'll still taste good though).
- When you're ready to bake, preheat your oven to 350 degrees.
- Roll each ball of chilled dough in granulated sugar (optional, but it does make them look prettier) and then place on a parchment-lined baking sheet approximately four inches apart, as they will spread. Any cookies that are not going into the oven immediately should go back in the fridge to stay cold.
- Bake for approximately 10-12 minutes in the middle of the oven. The tops of the cookies should NOT look wet, but you also do not want to overbake these as the under-baking is what keeps them so soft for so long. They will puff up while baking, and settle and crackle as they cool.
- Place the cookie sheet on a cooling rack for five minutes to allow them to cool slightly. If you can, carefully slide your parchment paper with cookies on it directly onto the rack so they can cool completely. If your cookie sheet has sides, this may be tricky. You may have to leave them on the baking sheet until they're cooled enough that you can move them safely. The cookies are very soft when warm so we keep them on the parchment paper to avoid them either falling apart or taking on the imprint of the cooling rack on the bottoms.
- Store cooled cookies in an airtight container at room temperature. You can also keep the unbaked balls of dough refrigerated in an airtight container for up to five days before baking. Once the dough has chilled for the initial hour, the balls will maintain their shape and you can safely layer them in the container, with a sheet of wax or parchment paper between each layer, to save space in your fridge. Enjoy!
Disclosure: if you know me at all, or have read enough of this website to appreciate that honesty is always my policy, you know that I am here to spread the word about things that I love: food, products, charity organizations, etc. Occasionally, through something called “affiliate links” (links to products on Amazon, specifically) there is a chance I may earn a small commission, at NO additional cost to you. But I am legally required to tell you that as an Amazon Associate, I earn from qualifying purchases. Whether an item earns me a commission has NO IMPACT on my decision to list it, and if the item is on a site for which I earn zero commission (i.e., any site OTHER than Amazon) I will still link to it! It would go against everything I stand for to profit off of misusing your trust. I only recommend products I actually use myself (or occasionally link to other products as examples or points of comparison), and all opinions expressed here are entirely my own.


